Image Editor
- In this article:
Open Image Editor
In order to open a image editor, you have to click ![]() .
.
Alternatively, you can open the editor in a separate window by clicking on the Edit in a new window link inside the editor on the header on the right. This link can also be used the next times to open the separate editor.
Image Editor Show Mode
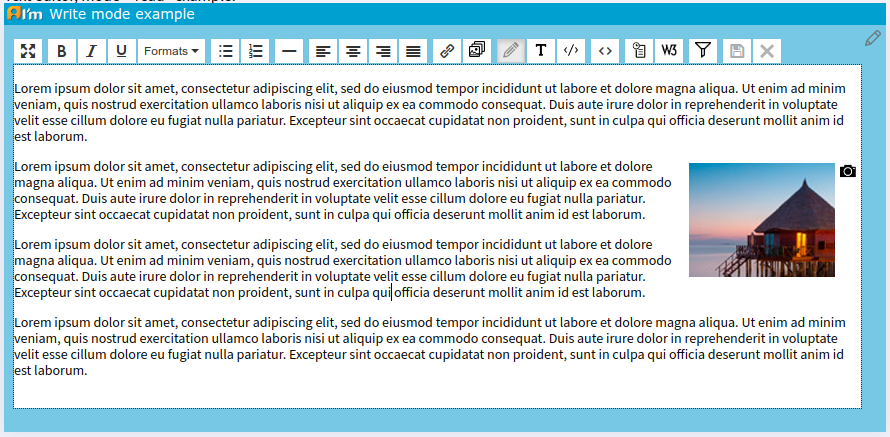
Text editor has default and small views on the page.
The default editor is highlighted on the page.
The content of the small editor immediately looks like a preview. Hover over i to see the label.
Introduction
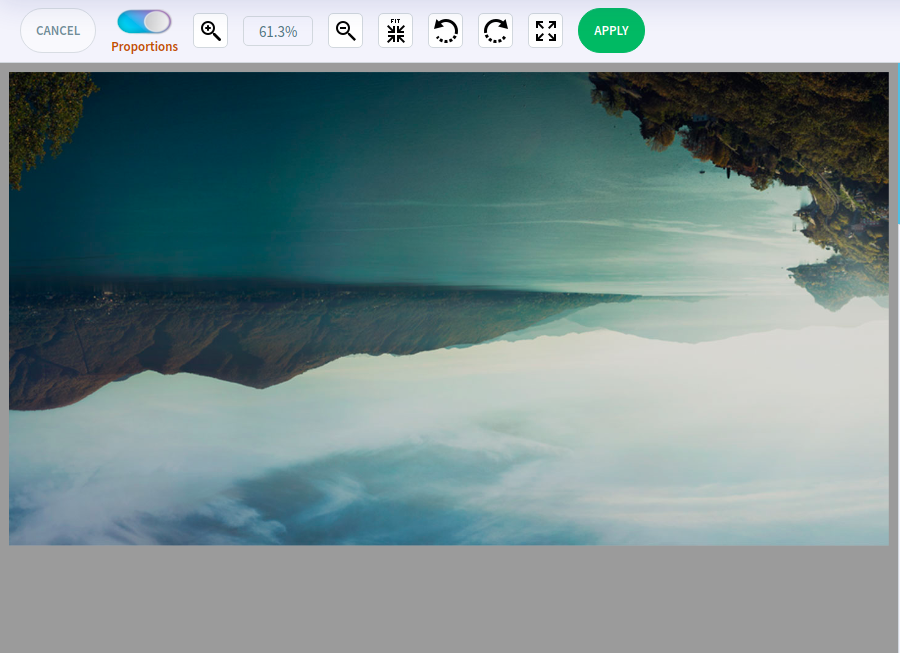
Inside the image editor, we see the workspace with the edited image, editing tools on the top, and the image attributes on the right.
You can also switch and see the original state of the image by clicking Original at the top and right of the workspace. Click Edited to switch back.
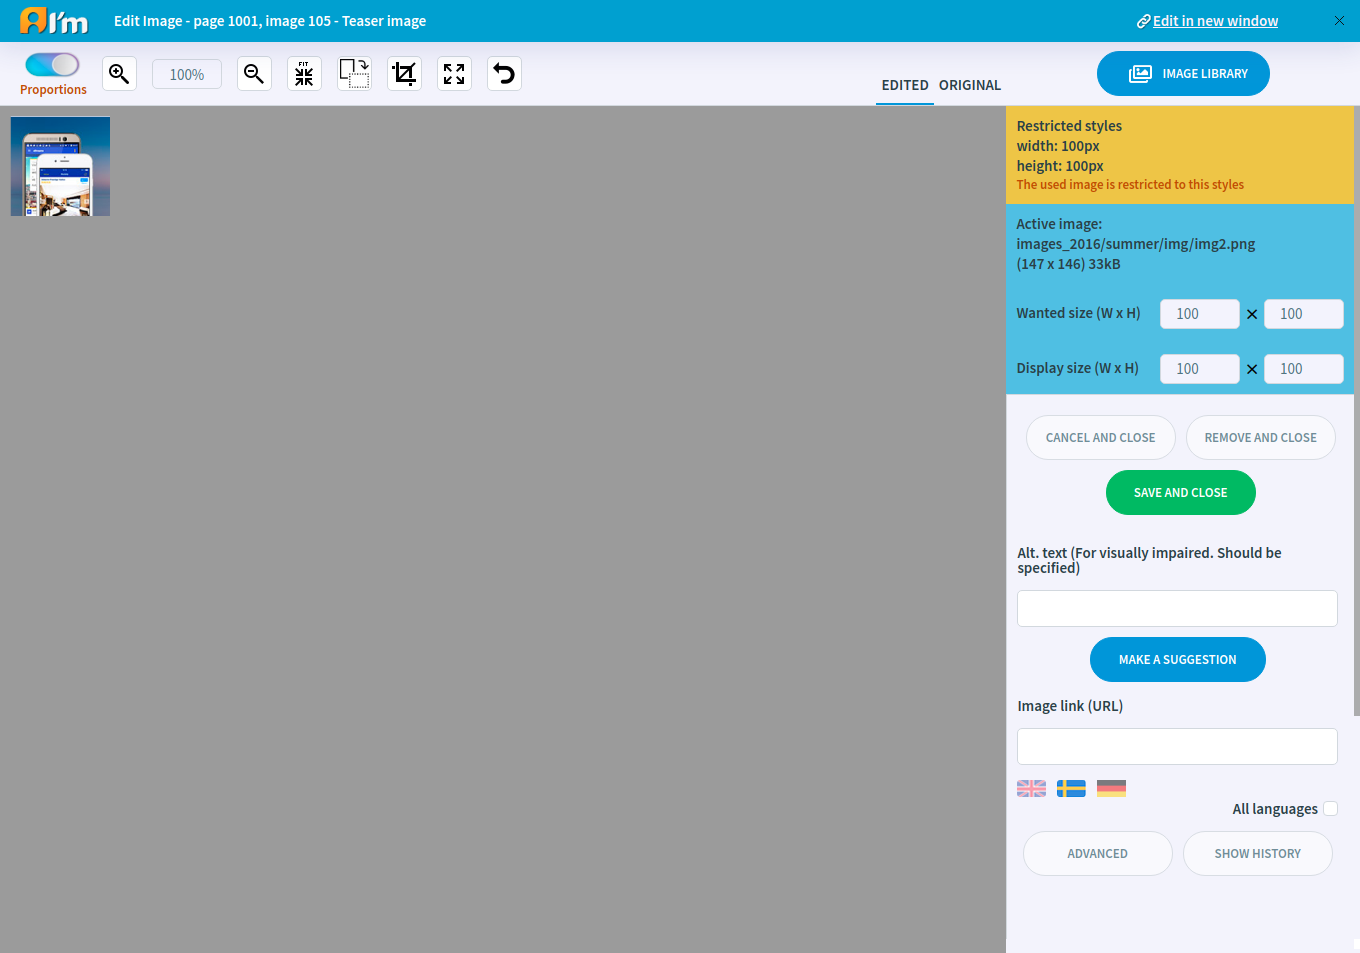
The developer can restrict image size by setting minimum width/length, fixed width/length, maximum width/length. You can see this information in the area highlighted in yellow.
Note
Developer can limit the size of the image.
Image Management
In order to select a new image you need to go to the Image Library Image Library by clicking Image library button at the top and right.
Save and close button - save the image in current state and close the editor.
Cancel and close button - cancel all changes and close the editor.
Remove and close button - remove the image and close the editor.
Languages
You can switch to the same editor but for a different language by using the language flags on the right. In addition, you can set the same image for all languages by enabling All languages checkbox.
Image Editing
|
enable/disable aspect ratio when cropping and resizing an image. |
|
zoom in/out the image for viewing. |
|
zoom out to fit the image completely within the work area. |
|
enter a crop mode. |
|
enter a crop mode. |
|
revert back to the original state of the image. |
|
revert back to the preview state of the image. |


Note
Proportions affects the process of cropping and resizing images.
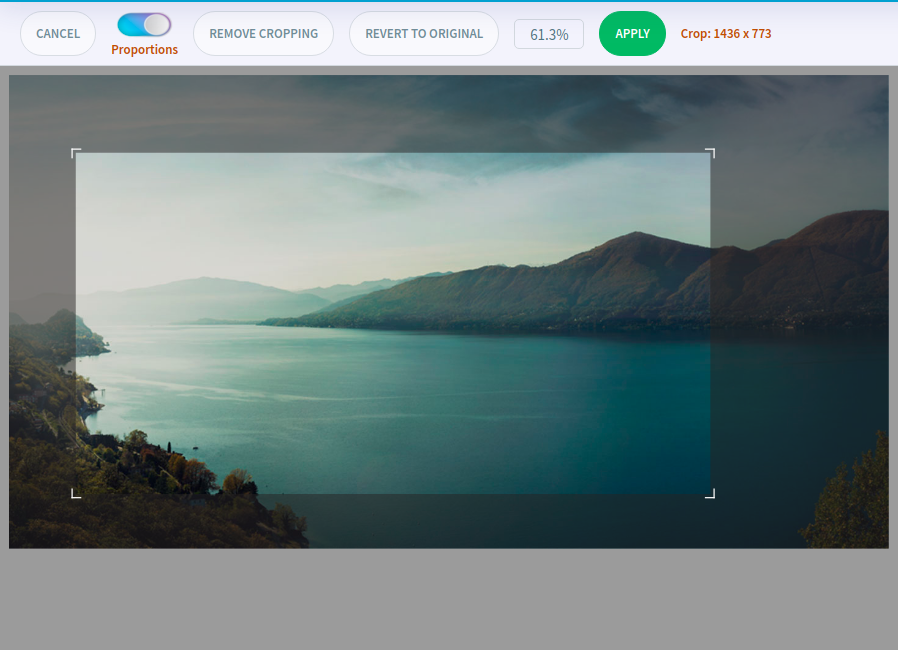
Cropper
Click  to enter a crop mode. Here you can crop the image by dragging the corners.
Remove cropping - revert to the previous accepted crop area.
Revert to original - revert to the original crop area.
Apply - apply changes.
Rotation
Click  to enter a rotate mode. Here you can rotate the image using
  and
and  .
.
Warning
90 degree rotation may not be available due to size restrictions that the developer may have set.
Resize
You can resize the image using the Wanted Size fields in the blue highlighted area. The size is specified in pixels.
Warning
Resizing may not be available or have borders due to size restrictions that the developer may have set.
History
If you click the Show history button, a table with previously saved images will appear. The table shows the save time, the username, and the path to the image.
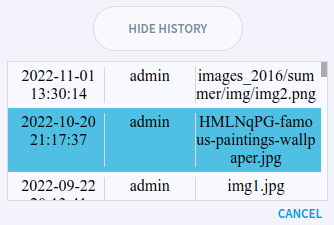
To apply the previous image, click on it in the list. To cancel - click Cancel below the table.
To close the history table click Hide history button.
Note
Max number of records in the history can be configured by developers.
Image Attributes
Alt text - the text to be displayed instead of the image if the upload fails. There is an example below.
Note
Whether this field is required can be configured by developers.

Description text - the text that can be be displayed in Image Data tag.
Image link - the link that will open in a new tab if the user clicks on the image.
Advanced
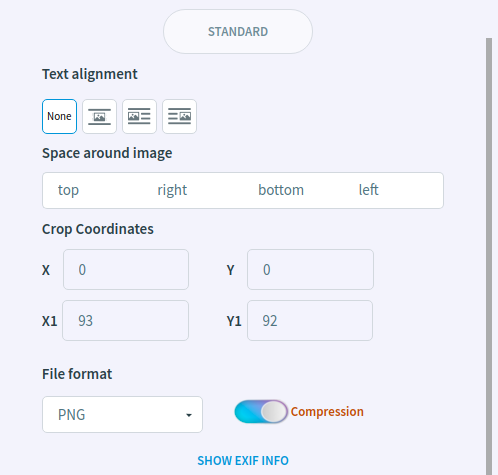
Click Advanced to open advanced features and click Standard to close.
What can you do:
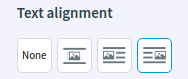
- Allow to write text around the image.
The text editor gives you the option to use an image editor internally. You can allow text to write text around the image. There is an usage example below
Specify the coordinates at which the image will be cropped.
Select the format in which the image will be saved.
- Cancel the image compression process.
Image compression reduces the size of the image, so image will take up less disk space and load faster on the page. Compression can sometimes degrade quality.
- View exif information.
Exif info - metadata tags, information commenting on the file, describing the conditions and methods for obtaining it, authorship, etc.