Menu Editor
- In this article:
Open Menu Editor
In order to open a manu editor, you have to click ![]() .
.
Alternatively, you can open the editor in a separate window by clicking on the link inside the editor on the header. This link can also be used the next times to open the separate editor.
Menu Editor Show Mode
Text editor has default and small views on the page.
The default editor is highlighted on the page.

The content of the small editor immediately looks like a preview. Hover over i to see the label.

Introduction
Menu items are documents.
The menu editor consists of a workspace for manipulating menu elements and Document Manager.

Menu Item Management
In order to add a new item to the menu, you have to:
Hold
 that appears in the row of the document in the list.
Move it to workspace on the left.
You can remove an item in two ways:
Move the mouse cursor over the item and click X that appears.
Enable Multi-remove, select items and click Remove.
Note
Admin must have access to a document that he wants to add to the menu. Or this document must have enabled Share the document with other administrators. Read more about access control here.
Menu Item Sorting
Possible sorting of items in the menu:
Tree Sort - sorting manually with the ability to nest items inside others.
Manual - sorting manually without nested items.
Alphabetical (A-Z) - alphabetical sorting by title from A to Z.
Alphabetical (Z-A) - alphabetical sorting by title from Z to A.
Published (new first) - sorting by publication date from latest to oldest.
Published (old first) - sorting by publication date from oldest to latest.
Changed (new first) - sorting by date modified from latest to oldest.
Changed (old first) - sorting by date modified from oldest to latest.
We can manage menu items using numbers or by dragging the items while sorting manually.
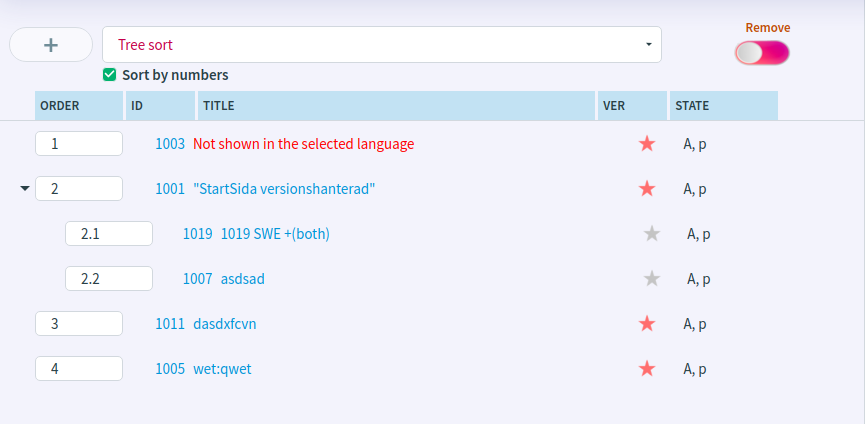
Manage by numbers
Enable the Sort by numbers checkbox under the dropdown list of sort options.
The order of the items is indicated by numbers, starting from 1.
Tree sort sorting allows to nest items. To nest an item, you have to use a dot (.) and start the order inside from 1. For example, the item is first - 1 and has 1.1, 1,2 items inside.
Manage by dragging
Disable the Sort by numbers checkbox under the dropdown list of sort options.
In order to change an item position, you have to hold the mouse on the document (anywhere, but not ![]() ) and move up or down.
) and move up or down.
Tree sort sorting allows to nest items. In order to nest an item, you have to:
Move the mouse cursor over the item.
Hold the mouse cursor on
that appears on the left.Drag an item to another item.
In order to pull out an item, you have to:
Move the mouse cursor over the item.
Hold the mouse cursor on
that appears on the left.Drag the item outside of the current parent item.

Document Management
In order to create a new document, you have to:
Click + button on the top left.
In the open window, select the document type and click Ok.
Choose a profile (more details here) or a document id/alias that will be inherited for the current document and click Create.
Click Ok after filling in the required fields in the page info.
In order to edit a document, you have to move the mouse over the item representing the document and click  that appears.
In order to copy a document, you have to move the mouse over the item representing the document and click ![]() that appears.
that appears.